How to Add a New Expense?
Left menu > My Space > Expenses
Sequence simplifies the expense import process for you:
-
Reports are easily created by your employees from their Sequence account.
-
Receipts can be scanned using a smartphone.
-
Sequence automatically extracts key information, eliminating the need for manual entry.
-
The report is sent to Human Resources for validation, where compliance is checked before reimbursement.
-
Expenses are automatically recorded in the correct accounts.
1. Follow the above-mentioned workflow to land on the Expenses grid. Go to My Space.

2. Click on Expenses

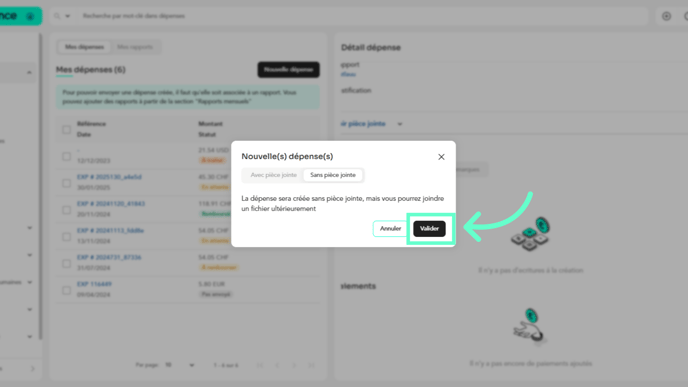
3. Click the New expense button located at the top-right corner. Doing so opens the New expense(s) popup.

4. Here, choose whether you want to add an expense with or without the attachment by clicking the corresponding tab.
It is possible to create an expense in Sequence with or without a scanned receipt.
If you upload a receipt, Sequence will automatically extract the relevant information. You can upload an invoice or a sales receipt.
You can also take photos of your receipts using your smartphone. To do this, simply log in to your account from your smartphone.

5. If you proceed without attachment, click the Validate button to proceed.

6. In case you choose with attachment, click the Add a document button to upload an attachment from your system storage.

7. Once that is done, click the Validate button.

8. Les nouvelles dépenses sont ajoutées à la liste de Mes dépenses.

9. Cliquez sur l'icône à trois points et sélectionnez l'option Traiter la dépense.

10. Si vous avez importé un ticket pour ajouter une nouvelle dépense, Sequence aura extrait les données du ticket et aura prérempli des champs tels que le numéro, la référence, la date, la devise et le vendeur.
Vendors are different from your suppliers. They are only related to expenses.

11. Select the report from the Report dropdown list. Expenses must always be grouped in a report in order to be sent to human resources and reimbursed.

12. Moving on to the Expense Details section, choose the purchase category from the Select a Purchase Category dropdown.
The expense category allows you to manage your accounting easily and automatically, without any accounting knowledge. Simply choose what the expense is for, and Sequence will take care of recording it in the correct account. For more advanced management, the "other" option gives access to the chart of accounts (recommended for users with accounting knowledge).

13. Make a selection regarding the VAT inclusion using the VAT dropdown.

14. In case the VAT is not recoverable, unmark the Recoverable VAT checkbox.

15. Enter the service or product name using the Service or product field. Select the TVA percentage from the TVA % dropdown. Enter the total in the Total field.

16. To add more items, click the + Add a line button.

17. If you click on the "Line Scan" tab, you will see how Sequence has extracted all the product lines specified in your receipt.

18. Enter the justification for the expense in the Justification textbox.

19. To save and exit, click the downward arrow icon next to the Save and Continue button and select Save and Exit.

20. If you want to validate this expense and move on to the next one, click on the Validate and continue option.
